.png")
.png")
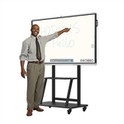
How to adjust the splicing display screen steps of LCD LCD video wall debugging tutorial
How to adjust the picture of the splicing display? The LCD video wall is usually used by splicing multiple screens. After installation, it is also necessary to debug the picture of the splicing display. There are two specific debugging methods. 1. Use the distributor to debug. Install a distributor between the computer and the LCD video wall, usually HDM HD distributor. Its input end is connected to the computer, and its output end is connected to each LCD video wall. Its function is two. One is to display one picture on the whole screen, Second, each LCD video wall displays the same picture. 2. Using matrix debugging, the input end of the matrix can be connected with multiple computers at the front end, and the output end of the matrix can be connected with the LCD video wall. Compared with the distributor, the matrix supports multiple input computers to display on the screen at the same time, and can realize the functions of arbitrarily switching the display position; In addition to displaying one picture on the whole screen, its display function can also control multiple computers to be displayed on different LCD video walls, but it can only be based on one splicing unit

First of all, we must understand the structure of the liquid LCD video wall and install the liquid LCD video wall: the liquid splicing unit is composed of liquid panel, movement and fixed frame. Before the liquid crystal splicing unit is installed on the bracket, we must first assemble the liquid splicing unit to a satisfactory state, or click the "reset" button to return to the factory setting state. The consistency of the picture can only be achieved by operating under the large picture. 2. Liquid splicing large screen debugging image mode: Click ˆ The "image mode" button can set and select the image of the liquid product splicing unit of the liquid fixed splicing wall, which are respectively standard, "bright" and "user" modes. 3. Still image: click the "still image" button to set and select on and off the current image of the liquid product splicing unit of the liquid fixed splicing wall and the large picture mode, so as to carefully observe the fine and advanced settings of the picture (1) "Password check at startup" refers to that the startup password of the control software can be set. After clicking the start system button, it is necessary to enter the interface of password using the control software. The default password is (2) "intelligent screen expansion" and "smart screen expansion" in the manual ν The GA adjustment item must be in the supervision mode of picture splicing to be effective, It has no effect in the mode of "automatic video distribution status". This button can set the password of "start system" to turn on or off. (3) control the selected signal input or mode selection status when the software is turned off (4) "start switch to AV, VGA or HDM to select the selected signal input, and the screen will switch to the selected signal picture when the software is started. (5) √ GA splicing picture adjustment: (turn on the button first) GA automatically adjusts and memorizes the input channel, selects one or more units, and selects ∨ GA channel 1 "in the input channel box, Then click the "adjust" button to start the automatic adjustment of the selected liquid splicing unit. Wait about 10 seconds before the adjustment can be completed. Each liquid splicing unit of the liquid splicing wall and the current image in the large screen mode can be automatically adjusted to the best state (6) successively adjust GA channel 2 to 9 in the same way "Adjust. In the process of debugging each channel, if some images deviate left and right, you must first select the unit and then click the +" or "button of the clock. At this time, the image will move left and right, and then click ν GA automatic adjustment "button, wait for automatic adjustment, and finally click" save manual adjustment "button. At the same time, the following settings can be used for auxiliary adjustment: such as "horizontal displacement, vertical displacement, horizontal zoom, vertical zoom" button, and click the "reset" button to restore it to its initial state
Related Industry Knowledge
- How much is the video wall per squa...
- What kind of seamless video wall te...
- What are the splicing methods of se...
- What should we pay attention to whe...
- How to install seamless video wall
- Which is better LCD video wall or L...
- What are the differences between LC...
- What is the difference between high...
- What equipment and materials are ne...
- Common faults and solutions of LCD ...
- Is the larger the size of the LCD v...
- How big is the gap of LCD video wall?
- What is the meaning of hard connect...
- LCD splicing screen and small spaci...
- What do you mean by splicing panels...
- Is the OLED splicing screen transpa...
- OLED splicing screen and LED splici...
- Construction plan of the central co...
- Large screen matrix system and spli...
- Video Wall System